


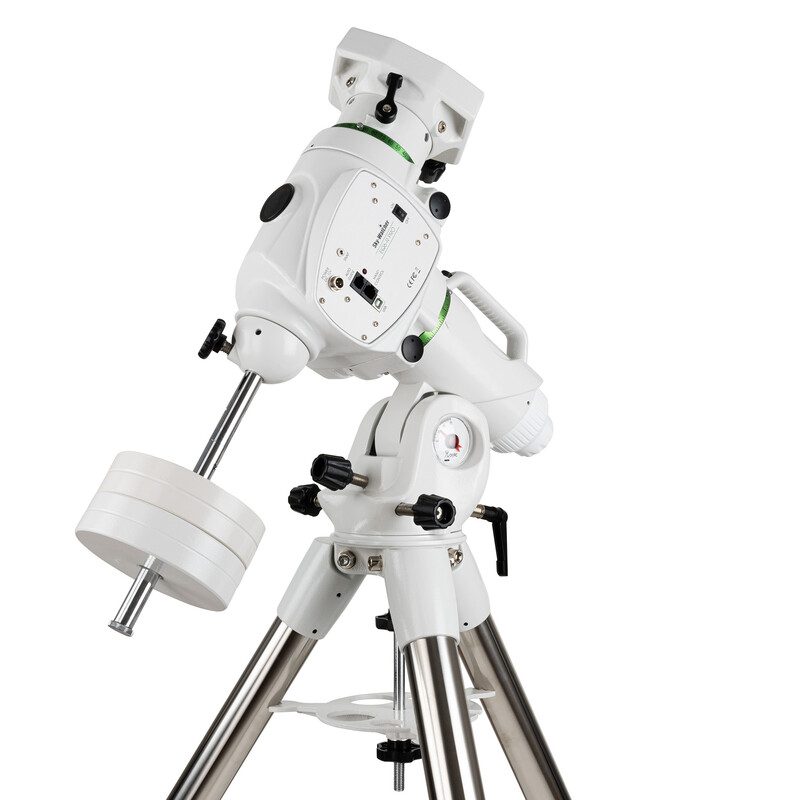
When you start with deep-sky astrophotography, you immediately think of the telescope and the camera. In reality, the most important piece of equipment is something else: the mount. It decides whether the stars will be sharp points or small streaks, and it is the foundation everything else rests on. In my setup, this role is played by the Sky-Watcher EQ6-R Pro.
Why you need an equatorial mount
The Earth rotates on its axis, which is why the sky appears to move: within a few seconds the stars shift enough to ruin a photo taken on an ordinary tripod. In astrophotography you shoot exposures of tens of seconds or several minutes, so the telescope has to follow the sky precisely.
That is exactly what an equatorial mount does. It has one axis, called the right ascension axis, which is pointed at the celestial pole, that is, parallel to the Earth’s axis of rotation. A motor turns it very slowly in the direction opposite to the Earth’s rotation, so the telescope stays pointed at the same object for the whole session. The second axis, declination, is used to move up and down.
The features of the EQ6-R Pro
It is a mid-range mount, very popular among astrophotographers, sturdy and suitable even for demanding instruments. These are its main specifications:
- Payload: about 20 kg. For astrophotography it is wise to use at most half of that, because the weight of the camera, filters, guide scope and cables adds up.
- Weight: the head weighs about 17 kg, the steel tripod about 7.5 kg, and there are two 5 kg counterweights.
- Motors: stepper motors with belt drive, quiet and free of play.
- SynScan GoTo: the controller holds a database of over 42,000 objects and slews the telescope to the one you choose.
- PEC: periodic error correction reduces the small tracking irregularities caused by the gears.
- Polar scope: illuminated and built into the mount, for polar alignment.
- ST-4 port: lets you connect an autoguiding system.
- Power: 12 V, with a power supply of at least 4 A.
With a small refractor such as the Sky-Watcher 72ED, the EQ6-R Pro works well below its limit, which is an advantage: a light load makes balancing easier and tracking more precise.
How to use it
Here is the sequence to follow on every outing. It seems long at first, but with practice it becomes a routine.
1. Setup and leveling
Open the tripod on stable ground and level it with the bubble level. Fix the head on the tripod with the axis facing north, for example using a compass or a phone app. A good initial orientation makes the following alignment much faster.
2. Latitude and counterweights
Set the axis inclination on the scale to match the latitude of your observing site. Then mount the counterweights on the bar, still without the telescope.
3. Mounting and balancing the telescope
Attach the telescope with all the accessories you will use during the evening: camera, filters, cables. Then balance it by loosening the clutch of each axis and moving the counterweights (right ascension) and the telescope in its holder (declination) until it stays still in any position. A well-balanced mount works better and puts less strain on the motors. Many astrophotographers leave the right ascension side slightly heavy toward the east, so the gears always stay in contact.
4. Polar alignment
This is the most important step. You can use the polar scope: bring Polaris to the position marked on the reticle, adjusting the altitude and azimuth of the mount. I use software instead, SharpCap, which gives a very precise alignment in a short time. The more precise the alignment, the better the mount follows the stars and the fewer corrections are needed during long exposures.
5. Framing and imaging
At this point the mount tracks the sky and you can start shooting. The mount is controlled by my notebook, which sends real-time guiding corrections through software: they compensate for small mechanical imperfections and keep the stars pinpoint even in long exposures.
6. At the end of the night
Use the park function, which returns the mount to a rest position, and then switch everything off.
A few tips
- Choose a spot with solid ground: a precise mount on a vibrating base is useless.
- Use a power supply or battery that is up to the job: too low a voltage causes tracking errors.
- Arrange the cables well, so they do not snag when the telescope rotates.
- Take the time you need for polar alignment: it is what pays off the most.
Follow me
If you found this article useful and want to see my new shots, follow me on Instagram and AstroBin.
Leave a Reply